Sunday, March 30, 2014

In the Ground

How about a quick update on the Septic system?  Yeah, yeah, I know it's not interesting but remember this blog is a record for my reference as much as it is for you so you will need to tolerate the boring bits.

The short story: we are officially owners of a Travis County and Lower Colorado River Authority (LCRA) approved septic system.  They made the final burial last week - that is, they spread 12" of top soil over the septic drainage field, and covered the storage tanks.  And I, for one, hope to never see them again.  I ran out there with Alex and Gavin to spread some grass seed over the new dirt to get some erosion control going.  Which in this drought is like sprinkling grass seed in the Sahara and hoping for a lush lawn.  If you have any magic beans I'll trade a cow for them.

Here are the 2 tanks.  Don't ask me how they work.  As far as I can tell, "stuff" goes into one of them and goes through some changes, then moves over to the other tank to simmer a while and then it gets pumped up to the drainage field.  I like to think of it as a mysterious metamorphosis not unlike a caterpillar becoming a butterfly.  But without all the beauty and actual mystery.  Let's move on.

 Here are the pipes heading up to the drainage field.  The larger white one appears to be a clean-out.


 The three images above are of the drainage field.  Kinda large, huh?  With a foot of dirt in place over this we plan to put it to good use.  It will ultimately have a nice green lawn over it and we'll put a volleyball net across it.  Photos below are with dirt.


When the septic installer turned on the main water line to load the septic system for inspection he discovered a problem.  It looks like we had a casualty from the winter freezes.  This valve was cracked and began barfing water all over the place when opened.  Just another problem...


This is pretty much how I felt when I had to call the plumber to come fix the line:


C'est la vie.  Valve is replaced and all is fine.  For now!  Thanks for stopping buy.

Tuesday, March 18, 2014

Counter Culture

With the cabinets in place we wasted no time getting the counter tops installed.  We chose a 3cm thick quartz material in Pure White color.  The cooktop side will be standard install with a square edge finish.  For the island we are going for the waterfall style with the quartz running down each side.  We also decided to put a 16" deep counter directly beneath the large picture window.  This will be a great little niche for eating, a game of chess or just taking in the view.  Since we will not be using a typical kitchen table set the addition of this counter will allow us to have 8-9 people seated at once.  Not a formal arrangement, but formal is not the intent of this house.


Here is the crew about to get serious on a chilly day.  The island top and the waterfall sides meet in a 45 degree miter cut.  They made these cuts on site.


Here is counter with cook-top cutout.  Pretty simple on this side...nice and clean.  And below are some shots of the island and sink.  We had 3 holes cut at the sink.  The center is for a single hole industrial spray faucet, left side is for a soap dispenser and the right will be a punch switch for the disposal.


Above you can see the mitered corner finish.  The guys did a nice job.


In order to attach the counter on the back wall the crew used stainless steel L-brackets.  Each one is load rated to 250 pounds - and we used 7 of them!  We don't want to worry about someone sitting on the counter and ripping it out of the wall.  We really wanted to have a "floating" counter look so they cut the drywall away from each stud and mounted the bracket directly to the 2x4.  The drywall crew will return later to patch the holes and the end result will be totally hidden brackets.  Here are a few shots of the install.


With the last minute switch of the island cabinets and dishwasher we were able to get the sink directly aligned with the picture window.


Come back in a day or two and I'll have updates on septic (I know, boring) and trim carpentry upstairs.

Sunday, March 16, 2014

Kitchen Cabinets

I can't believe I am writing these words.

Our kitchen cabinets are installed.

I know.  I know.  It's unbelievable - at least for us. In 2 days our kitchen cabinets went from this...


to something actually tangible.  Something you could place your hands, not just your imagination, on... something...REAL.

We shopped around for quite awhile for our cabinets.  We had a number of custom cabinet shops quote our kitchen in a contemporary or "European" style.  And we looked at a few online shops that construct and ship cabinets based on framing dimensions.  But in the end went with the Ikea system.  We just couldn't beat the quality, the extensive number of options and the cost.  They really have the kitchen product figured out.  Ikea also offers an online design tool that allows one to layout the entire kitchen (everything from door handles to appliances).  Roberta and I literally designed over a dozen kitchen layouts.  The software generates warnings if you do something impossible, or outside of general install  recommendations, and produces a bill of materials and cost.  Catch them during one of the 20% kitchen sales and you have everything you need make a new kitchen happen.

As for our install -  it was a 3 day whirlwind.  We hired a 2 man crew to come in an install everything per our design and they didn't mess around.  By lunchtime cabinets were assembled and going up.


They started with the wall cabinets.  We designed them to be flush with the ceiling in 2 rows.  We don't have much storage space in this house so we maximized cabinets space.  The pony wall will provide the back support of the island base cabinets and support the large counter top.

The wall cabinets went up without much drama, but we ran into a problem with the island cabinets.  The plumbing stubs in the foundation didn't align with the sink and dishwasher layout we planned.  One option was to have the plumbers move the plumbing, the other was to redesign the base cabinets in the island to accommodate the plumbing.  We chose to change our cabinet selection.

Initially we had the dishwasher (cabinet #7 above) to the right of the sink (cabinet #8).  But we had to move the dishwasher over to where cabinet #9 was and put a 36" cabinet on the right side of the sink.  The problem was this placed the sink left of center.  So we had to change some other cabinet widths to get it aligned.  If the sink is centered on the island then it will be inline with the cook-top and be centered with the rear picture window.  This all sounds like gobbledygook, but it worked.  I was able to pick up the new cabinets in a day and install continued.


Gavin had an orthodontist appointment that day, so he got to skip a bit of school and visit the kitchen with Bert.  He is standing in front of the kitchen as it was after day one.


The installers marked the back of the pony wall with the size and location of the revised cabinets so no one would get confused.


On the second day the base cabinets were installed and the drawer and door panels were attached.  We used Abstract Gray for the all of the base cabinets, and the wall cabinets are Abstract White.  Each panel comes with a thick protective plastic film laminated to the surface to protect it from dirt and scuffing so you can't see the true color until we remove it.

There was one unresolved problem the installers helped us overcome.  The island is 11 feet long, and code requires we have 2 electrical receptacles somewhere along the span.  We are planning to install a flat counter top with waterfall sides and really don't want to cut openings in the slab for receptacles.  Our idea was to build some false panels on the front  of the island at either end to host the receptacles.  Our installer immediately understand the idea and signed up for the job.  I had to supply some finish grade plywood and electrical materials and he made it happen.


He cut a hole in the side of the cabinet base just below the drawer.  Then used the plywood to create and 4 inch extension of the cabinet on either end.  Using a piece of cabinet filler panel he was able to match the front of the faux cabinet to the cabinet doors.  When the counter top is installed it will conceal all of the plywood.  It looks like a factory finished option and we love it.


The appliances will go in in a couple of weeks.  Nothing exceptional happening there, but we did opt for a Microwave installed in the base cabinets to the left of the oven  (in case you were wondering what the 2 open cabinets were there for in the above photo).  The next update will be counter tops.  Thanks for stopping by.

Sunday, March 9, 2014

Stair Master

Now that the floors are complete Kevin and his gang returned to the house to install the staircase.  The base was attached to the floor with concrete anchors.  The stringers were attached to the 18" thick header with some enormous lag bolts.  They welded the stringers to the base and that's all there was to it.  

The railings were not installed for fear that they would be damaged by trades going up and down the staircase with boxes of tile, wood, tools, etc.  Plus, the upper railing will bolt directly to the bamboo flooring after it is installed so waiting makes sense.


And as mentioned before we chopped up some 2x12's to use as temporary treads.  Before we knew it, access to the second floor was once again available.


You can see one of the PSL treads on the left side of the landing.  This will be the final tread material.


Our plan is to run a long PSL beam under the horizontal window above.  It will mount on the wall just beneath the receptacles on the wall.  The beam will be 18" wide PSL and align with the 3rd tread, then extend to the right, stopping short of the front door.  This will be a discrete work space that could host 3 kids working on home work...


Everything looks great, right?  Not quite.  Apparently there was some confusion during install (we weren't there) and everything didn't fit as well as it did in the weld shop.  There were 2 issues.  The first one was obvious to the welders during install.  The second one would be discovered a couple days later when we were checking out the work.  Here's the first problem:

Initial install with a 5" gap between the wall and the landing. 
You can see in the above picture that the landing does not reach the wall.  Obviously this was not the design intent.  The stringers are mounted to the 2nd floor header but when mounted to the landing base they fall short.  We were bummed about the gap, but if this home build project has taught us anything it was to turn an 'oops' into an opportunity.  So Roberta and I began making plans to have a small planter box made from 18 gauge steel to fill in the gap.  We would fill it with black rocks and bamboo plants and make it look like an intentional design feature.

The second issue was more significant.  The pitch from tread to tread is 7.5".  This keeps us within Austin code* and gives us a safe staircase.  But the first tread up from the landing was 12.5" high.  You can see it in the image below.  There are 23 steps in this stairway and if all of them are 7.5" apart except for one you know that there are going to be some wipe outs.  


There is a 12.5" rise between the landing and first step... no good.

I called Kevin and explained the problem with the first step rise.  He listened and was having trouble understanding the problem.  He stated that they had the entire thing measured and assembled in the shop and there wasn't any issue with step rise...  So I sent some picture with measurements.  And a day later Kevin called and said he knew what the problem was and that he would take care of it.

A couple of days later the welders returned to the scene of the crime and made good.  Basically, the C-Channel stringer was cut too short.  In fact, all of the steps were slightly 'downward' sloped.  They cut the stringer free from the base, moved it against the wall as it should have been, and welded a 2" piece of steel to fill the gap.  Below you can see the result before sanding and touch up paint.  They added another bracket to create the step between the landing and the (previous) first step.  And the landing was cut free from the concrete and moved against the wall as initially designed.  Problem solved!


Modified Stringer to allow for additional step and placement of the landing against the wall.

While the stairs were going up the kitchen cabinet installers began their project.  So the next post will be a kitchen update.  Thanks for checking in.

Wednesday, March 5, 2014

The Ground Floor

Our intention throughout the project was to leave the natural concrete flooring throughout the downstairs.  If you know this is what you want from the onset of your project make sure you communicate it with the cement contractor when the slab is poured.  We did, and the concrete team applied a special finish to provide an extra smooth surface.

For all of you that have been following us through the project you know that we poured our foundation 10 months ago!  Well, during the build there were random nails, concrete bolts and fasteners used to construct framing, the roof and the exterior elevation.  And some of these random nails and hardware made their way to the concrete.  And it rained.

And rust stains were born!

Now that the time has come to finish the floors we are faced with these oxidation artifacts.  It's not like the entire floor is covered with rust stains, but there are enough random marks that you definitely take notice walking across the room.  The stains aren't a random cloud shaped blemish, it is actually a perfect outline of the offending hardware - a nail, or washer - so it looks like an item lying in your path.

We met with the concrete finisher and he surveyed the condition of the floor.  This was not a simple task as there was a bunch of plaster dust on the floor from the recent drywall revision.  He explained the process to us.  They come in with some fine grit polishing wheels and scrub the floor clean. Then stain is applied (if you choose it, we did not) and then a polish is worked in to seal everything.

Our problem is the random rust stains were too deep to be scrubbed free in the polishing process.  One options was to polish the rust spots with a little extra "oomph" but this risked exposing the concrete aggregate and changing the texture of the floor in those areas.

Here are a few test patches of the concrete mechanically polished, then sealed (no stain).  The natural coloring comes through.  There aren't any rust blemishes in the test spot, but the result had more brown tones that we wanted.


So we decided to investigate a concrete dye product.  This is different from an acid based stain which chemically etches the surface.  The dye products are suppose to be more uniform in their coverage.  In a typical concrete stain application you will notice variations and 'marbling' from the acid reacting with the variances in the concrete surface.  The builder's concrete guy was really helpful.  He wanted this to work as much as we did, but the dye application was new for him and he wanted to make sure we all knew what we were getting into.  Next to the straight concrete sealer, he applied 4 variations of "gray" concrete dye products.  And we are glad he did - none of them really the look we were going for.  Take a look:


We were all surprised by the results - too dark for our tastes.  By the way, these test spots are located where the kitchen cabinets will be placed so they will be hidden from view.

So we began looking at other options.  Roberta assumed her role of Home Design Hero and discovered epoxy coatings.  Now this isn't a typical solution for most homes.  In fact, this is the solution for most garages and other industrial applications.  When I say 'industrial' think warehouses, grocery stores and car repair garages.  And you'll see it applied in residential garages, too.  The properly installed product is almost bullet proof.  In a typical application an epoxy floor will see daily wear and tear from heavy machinery like fork-trucks and high foot traffic stores.  The nice thing about this option is it is durable, and it covers every and all surface discoloration of the concrete.  The down side is there aren't a lot of people doing it (our installer only does 1-2 homes a year, but hundreds of garages) so we were nervous about trying it.  Once it was on the floor you were out of options.

There aren't a lot of images of this used in residences but here are a few pictures we found to give you an idea.


We found an installer locally and he pointed us to 
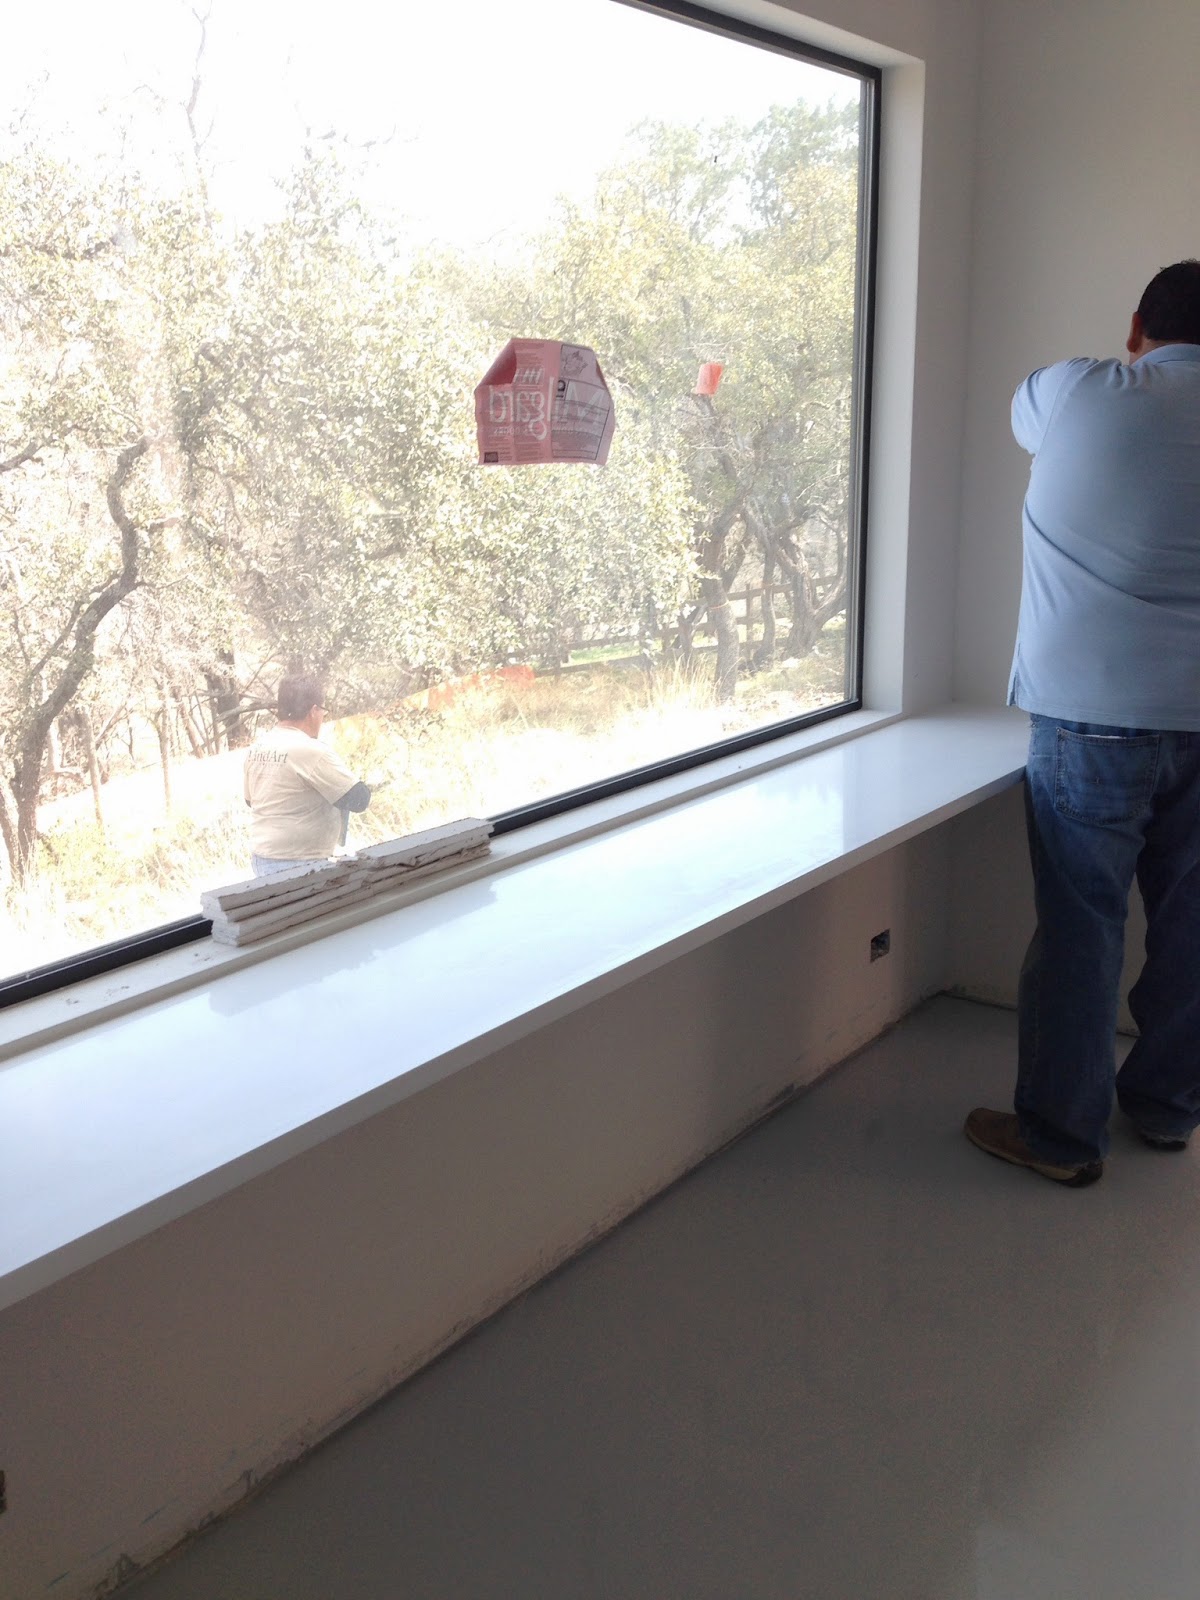
Arizona Polymer Flooring epoxy.  We chose Delta Fog as our color and pulled the trigger.  The entire process takes several days.  The floors are polished with a fine grit polishing wheel.  All dust is removed and then the epoxy is rolled onto the floor.  This is a allowed to cure for a day and then a clear urethane coat is applied which gives it a high gloss shine.  Once this is applied there can't be any traffic for 3 days until everything is cured.  We were worried about people walking into the house and spoiling the work so the installer taped off every door of the house to block entry.  I took a few pictures through the dirty windows during the cure and looked great.


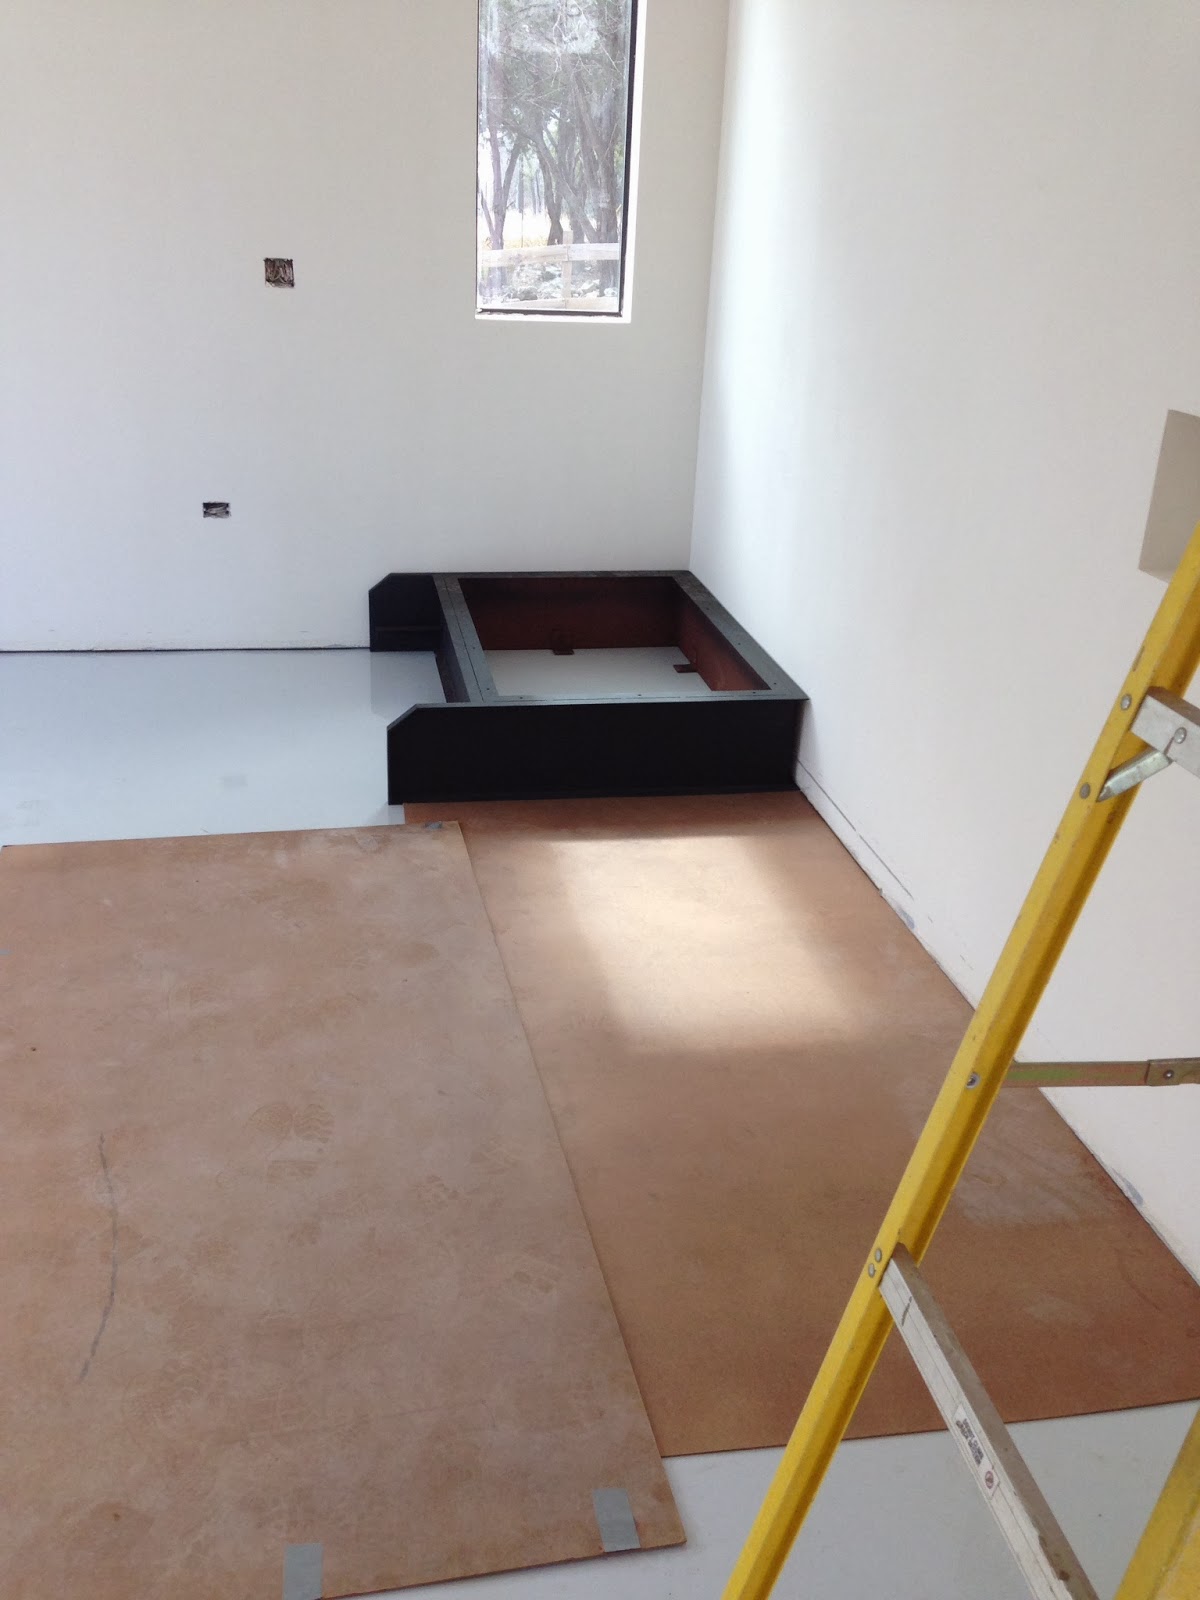
We are really happy with the results and plan to put the same epoxy on the garage floor and the rear porch.  They will add an aggregate to the epoxy on the porch to increase traction on wet days.  We won't do those applications until the end of the project to avoid potential damage from contractors.  I'll post some better shots (from the interior) in a future post.