Sunday, March 9, 2014

Stair Master

Now that the floors are complete Kevin and his gang returned to the house to install the staircase.  The base was attached to the floor with concrete anchors.  The stringers were attached to the 18" thick header with some enormous lag bolts.  They welded the stringers to the base and that's all there was to it.  

The railings were not installed for fear that they would be damaged by trades going up and down the staircase with boxes of tile, wood, tools, etc.  Plus, the upper railing will bolt directly to the bamboo flooring after it is installed so waiting makes sense.


And as mentioned before we chopped up some 2x12's to use as temporary treads.  Before we knew it, access to the second floor was once again available.


You can see one of the PSL treads on the left side of the landing.  This will be the final tread material.


Our plan is to run a long PSL beam under the horizontal window above.  It will mount on the wall just beneath the receptacles on the wall.  The beam will be 18" wide PSL and align with the 3rd tread, then extend to the right, stopping short of the front door.  This will be a discrete work space that could host 3 kids working on home work...


Everything looks great, right?  Not quite.  Apparently there was some confusion during install (we weren't there) and everything didn't fit as well as it did in the weld shop.  There were 2 issues.  The first one was obvious to the welders during install.  The second one would be discovered a couple days later when we were checking out the work.  Here's the first problem:

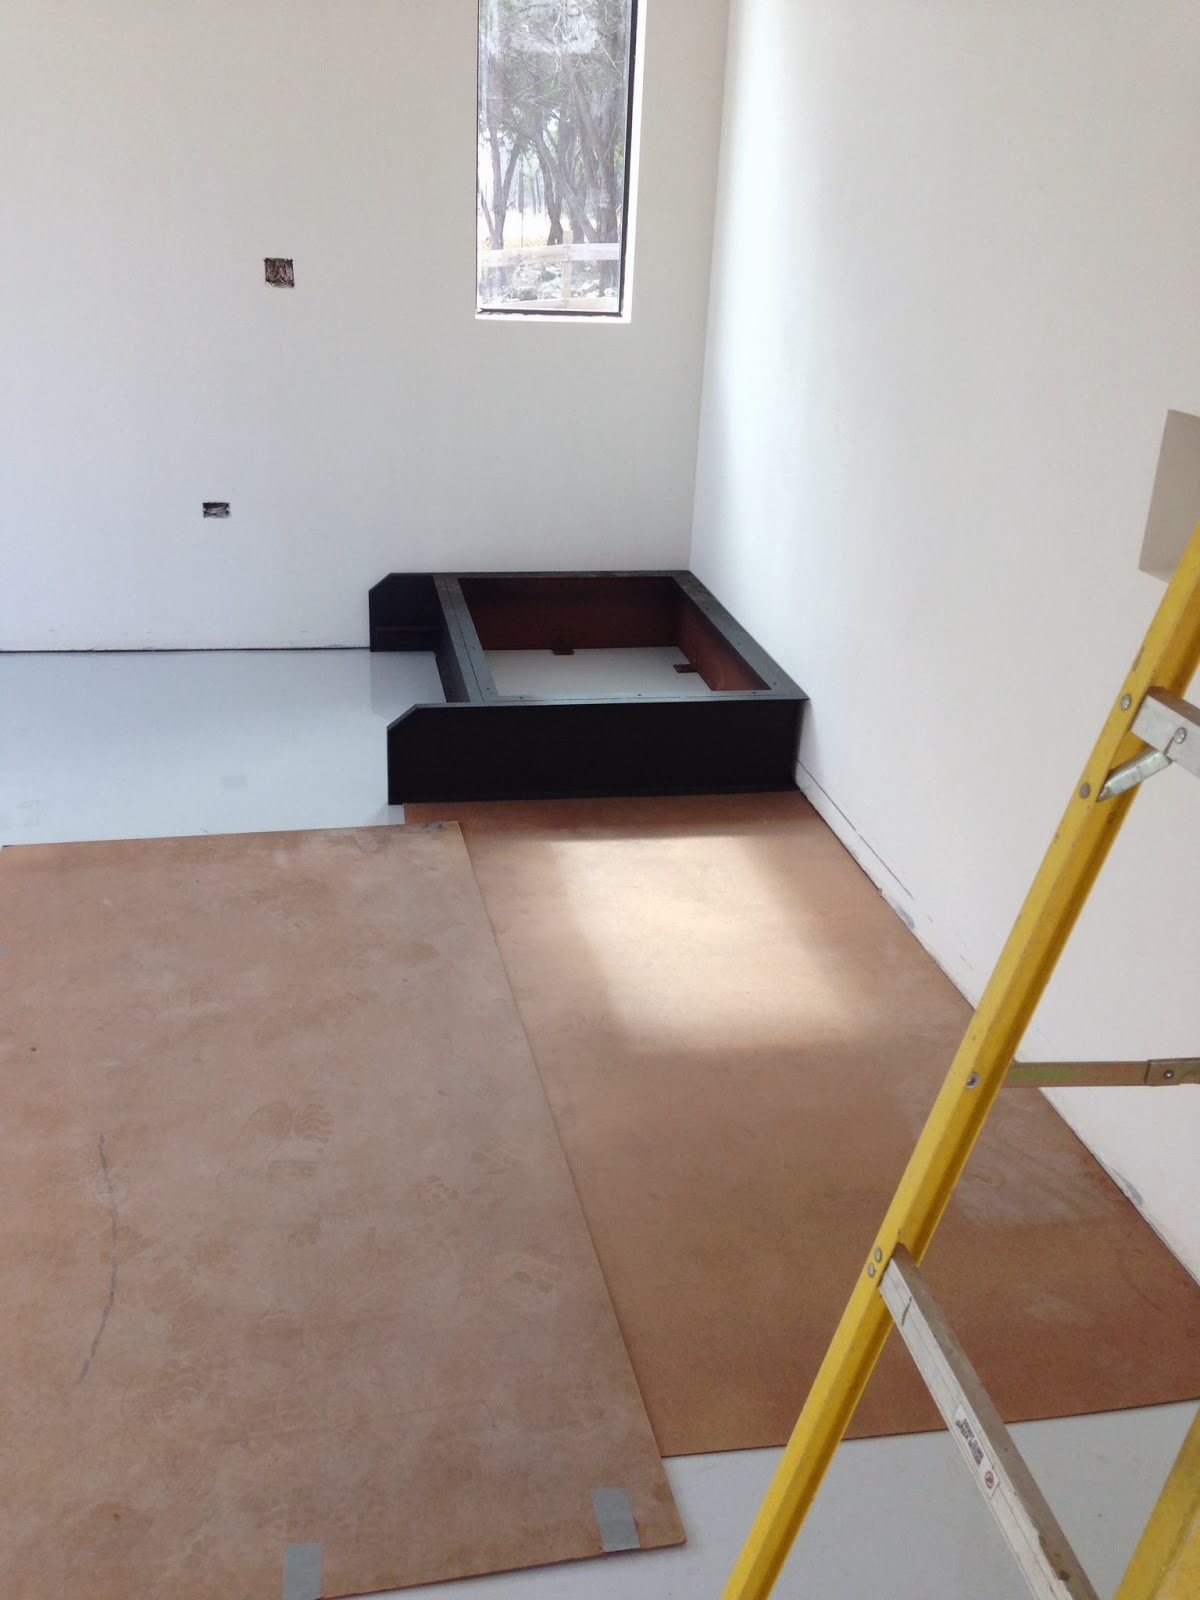
Initial install with a 5" gap between the wall and the landing. 
You can see in the above picture that the landing does not reach the wall.  Obviously this was not the design intent.  The stringers are mounted to the 2nd floor header but when mounted to the landing base they fall short.  We were bummed about the gap, but if this home build project has taught us anything it was to turn an 'oops' into an opportunity.  So Roberta and I began making plans to have a small planter box made from 18 gauge steel to fill in the gap.  We would fill it with black rocks and bamboo plants and make it look like an intentional design feature.

The second issue was more significant.  The pitch from tread to tread is 7.5".  This keeps us within Austin code* and gives us a safe staircase.  But the first tread up from the landing was 12.5" high.  You can see it in the image below.  There are 23 steps in this stairway and if all of them are 7.5" apart except for one you know that there are going to be some wipe outs.  


There is a 12.5" rise between the landing and first step... no good.

I called Kevin and explained the problem with the first step rise.  He listened and was having trouble understanding the problem.  He stated that they had the entire thing measured and assembled in the shop and there wasn't any issue with step rise...  So I sent some picture with measurements.  And a day later Kevin called and said he knew what the problem was and that he would take care of it.

A couple of days later the welders returned to the scene of the crime and made good.  Basically, the C-Channel stringer was cut too short.  In fact, all of the steps were slightly 'downward' sloped.  They cut the stringer free from the base, moved it against the wall as it should have been, and welded a 2" piece of steel to fill the gap.  Below you can see the result before sanding and touch up paint.  They added another bracket to create the step between the landing and the (previous) first step.  And the landing was cut free from the concrete and moved against the wall as initially designed.  Problem solved!


Modified Stringer to allow for additional step and placement of the landing against the wall.

While the stairs were going up the kitchen cabinet installers began their project.  So the next post will be a kitchen update.  Thanks for checking in.

Wednesday, March 5, 2014

The Ground Floor

Our intention throughout the project was to leave the natural concrete flooring throughout the downstairs.  If you know this is what you want from the onset of your project make sure you communicate it with the cement contractor when the slab is poured.  We did, and the concrete team applied a special finish to provide an extra smooth surface.

For all of you that have been following us through the project you know that we poured our foundation 10 months ago!  Well, during the build there were random nails, concrete bolts and fasteners used to construct framing, the roof and the exterior elevation.  And some of these random nails and hardware made their way to the concrete.  And it rained.

And rust stains were born!

Now that the time has come to finish the floors we are faced with these oxidation artifacts.  It's not like the entire floor is covered with rust stains, but there are enough random marks that you definitely take notice walking across the room.  The stains aren't a random cloud shaped blemish, it is actually a perfect outline of the offending hardware - a nail, or washer - so it looks like an item lying in your path.

We met with the concrete finisher and he surveyed the condition of the floor.  This was not a simple task as there was a bunch of plaster dust on the floor from the recent drywall revision.  He explained the process to us.  They come in with some fine grit polishing wheels and scrub the floor clean. Then stain is applied (if you choose it, we did not) and then a polish is worked in to seal everything.

Our problem is the random rust stains were too deep to be scrubbed free in the polishing process.  One options was to polish the rust spots with a little extra "oomph" but this risked exposing the concrete aggregate and changing the texture of the floor in those areas.

Here are a few test patches of the concrete mechanically polished, then sealed (no stain).  The natural coloring comes through.  There aren't any rust blemishes in the test spot, but the result had more brown tones that we wanted.


So we decided to investigate a concrete dye product.  This is different from an acid based stain which chemically etches the surface.  The dye products are suppose to be more uniform in their coverage.  In a typical concrete stain application you will notice variations and 'marbling' from the acid reacting with the variances in the concrete surface.  The builder's concrete guy was really helpful.  He wanted this to work as much as we did, but the dye application was new for him and he wanted to make sure we all knew what we were getting into.  Next to the straight concrete sealer, he applied 4 variations of "gray" concrete dye products.  And we are glad he did - none of them really the look we were going for.  Take a look:


We were all surprised by the results - too dark for our tastes.  By the way, these test spots are located where the kitchen cabinets will be placed so they will be hidden from view.

So we began looking at other options.  Roberta assumed her role of Home Design Hero and discovered epoxy coatings.  Now this isn't a typical solution for most homes.  In fact, this is the solution for most garages and other industrial applications.  When I say 'industrial' think warehouses, grocery stores and car repair garages.  And you'll see it applied in residential garages, too.  The properly installed product is almost bullet proof.  In a typical application an epoxy floor will see daily wear and tear from heavy machinery like fork-trucks and high foot traffic stores.  The nice thing about this option is it is durable, and it covers every and all surface discoloration of the concrete.  The down side is there aren't a lot of people doing it (our installer only does 1-2 homes a year, but hundreds of garages) so we were nervous about trying it.  Once it was on the floor you were out of options.

There aren't a lot of images of this used in residences but here are a few pictures we found to give you an idea.


We found an installer locally and he pointed us to Arizona Polymer Flooring epoxy.  We chose Delta Fog as our color and pulled the trigger.  The entire process takes several days.  The floors are polished with a fine grit polishing wheel.  All dust is removed and then the epoxy is rolled onto the floor.  This is a allowed to cure for a day and then a clear urethane coat is applied which gives it a high gloss shine.  Once this is applied there can't be any traffic for 3 days until everything is cured.  We were worried about people walking into the house and spoiling the work so the installer taped off every door of the house to block entry.  I took a few pictures through the dirty windows during the cure and looked great.


We are really happy with the results and plan to put the same epoxy on the garage floor and the rear porch.  They will add an aggregate to the epoxy on the porch to increase traction on wet days.  We won't do those applications until the end of the project to avoid potential damage from contractors.  I'll post some better shots (from the interior) in a future post.

Sunday, March 2, 2014

Garage Door!

Before getting to the point of this post I need to make a small acknowledgment - I'm falling behind!  Between job, kid's school and sports, and general everyday life it's been hard get the updates out.  I am going to try and get caught up over the next few days.  So the posts with be short and sweet, like this one.

Like everything else in the little project we began researching garage door styles and suppliers ages ago.  Since the garage is going to be a hang-out for people more than cars we wanted it to have some style from the inside and out.  We decided on a glass panel door - They look nice and let in plenty of light.  They are available with multiple options - single or double pane, insulation, clear or frosted glass.  Bradford Garage Door Works came out and installed the door.  These guys were simple to work with so look them up if your shopping for a garage door.  And they were hands down the best priced door available in central Texas.   Install took a couple of hours and we love the way it looks.  

The roof is sloped which gives us a short ceiling bracket on one side and a lengthy one on the other.  Looks a little awkward on the long side so we may have our stair guy (welder) create some more architecturally styled brackets to replace them.  


The door itself is a doozie.  The extra width and the glass contribute to its considerable weight.  The thing is flung up and down with a side mount motor.  This is great because it doesn't clutter the ceiling like a traditional chain drive opener.

Not a great shot but that little black box operates the door.
Here are a few shots of the final result.  Unfortunately there is a big ol' dumpster in front of the house now, so just pretend it's not there.


Thanks for stopping by!


Wednesday, February 26, 2014

Stairway to Anxiety

I am not sure what it is about staircases.  There is an invisible, but substantial, negative energy around the task of constructing stairs.  To be clear, it IS a technical endeavor.  Calculating the appropriate rise and run and accommodating the thickness of beams, treads, and brackets all contribute to the voodoo.  And once you embark on finding a contractor to whip up some stairs you start to recognize the look their eyes.  The ghosts of past stair projects haunting them.  Particularly when you are talking about steel.  Wood isn't as demanding a medium (no offense carpenters).  If you make a mistake you can rather easily re-cut or repair without devastating cost, but if you botch a solid welded stringer, or make a mistake on tread spacing a redo can get expensive.

Of course, after considerable investigation we decided we wanted a steel staircase in our home with big, chunky PSL treads (you can read about earlier stair discussions HERE).  Roberta contacted a dozen welders in the Austin area to bid the project.  Some were interested but were scared off early on and never followed through with quotes.  Others priced themselves out of the job (perhaps intentionally to avoid the challenge).  A couple were so unsure of the design that I fully expected to get a Dr. Suess style stairway to Cukooville if we handed over our money and faith.  We did find one shop that had everything we wanted - tons of experience with stairs, dozens of references and great prices - but when the time came to get to work they were inundated in work and were booked 8 weeks out.  Go figure.

3.5" thick PSL prototype tread in the garage.
In the end we located a great shop in Lakeway and they jumped right in to the project.  The shop owner is Kevin and he did a great job measuring and sketching out the design.  He also will be providing us with support struts for the door overhangs (future post).  We pretty much gave him artistic liberty with the handrail design and we chose to use stainless steel cabling for all of the horizontal railing elements.

After a week he announced everything was ready to install.  Roberta dropped by to check everything out and grabbed a few photos of the hardware.  Since there will be a lot of contractors going up and down the stairs in the coming weeks we decided we will install 2'x12" treads as a temporary solution so the PSL beams don't get roughed up.  However, we delayed the installation until the floors were complete so you will have to wait a few days to see the result.

Here is the landing - it's 58" x 40".

This is the handrail that will mount upstairs along the hallway before doubling back to come down the stringer.

Close-up of the handrail detail.  Stainless steel cables with run through the holes.

More railing after powder coat.

The stringers.  These are quite long as the floor to floor depth of the staircase in 12.5 feet.


Tuesday, February 25, 2014

Water In and Water Out


We had our water well drilled back in the summer months, and in January had the well pump and a 2500 gallon holding take connected.  The house wasn't ready for the water supply, but the crews on site needed access to water and this solved the problem.  Unfortunately it was a 200' walk from the house to get to the tap.

Now the time has come to get the water to the house, and start work on the septic system.  The timing could not have been better because we were issued our septic permit last February and were just a few weeks shy of letting it expire. Didn't even know that could happen... we just lucked out.

As I have mentioned previously the septic and water systems are not the responsibility of the builder.  Roberta and I need to provide the well, septic and electric connections to the house.  So we had to call in the big guns to make this happen.  First, we needed to get a couple hundred feet of trench cut to bury the water line up to the house, and a trench from the power pole to the well pumps, and over to the house.  Plus the septic field and tank needed to be excavated.  We also have a ton of dead trees on the property thanks to the ongoing drought and figured we may as well have the crew remove those to reduce wildfire risk.  This made us nervous because it was going to completely alter the look and feel of the site.  By the end of the carnage they filled three 40-yard dumpsters with trees, and we lost a lot of privacy we'll need to establish with some new trees.

Here is the trench that will contain the power and water lines from the utility pole and the well over to the house.

A rock saw made quick work of these utility trenches.
So, here is an opportunity to relay one of the random, unplanned hurdles that present themselves when building a home.  When the well pump and tank were installed we had 400' of 10-2 direct-bury wire run from the utility pole to the well.  Since the ground wasn't trenched we just lay the wire on the grass until we could get it in the ground.  A week later the trench was cut, and I got a call from the contractor explaining that he went to bury the cable and was almost electrocuted.  He claimed that the wire had been either dragged behind a vehicle, or was re-furbshed, or run over by a tractor...  Whatever happened the wire was ruined and it needed to be replaced.

That wire cost us $700 and it needed to be replaced after just a week.  

So I called the well installer and questioned the history of the wire and was assured that is was, indeed, new.  Curiosity got the better of him and he offered to go check it out.  Long story short, a varmint (or many varmints) considered this rubber insulation to be a delicacy.  There were teeth marks up and down the entire wire.  They we devouring the stuff down to the copper like a giant ear of corn.  I was able to find a supplier of the wire that had a 500' spool for $500 bucks.

Mike, over at APEX drilling rewired everything without charging us.  I'll give him a plug here - if you need a well in Central Texas you won's do better than Apex drilling.   He and his staff really are fantastic.  When I met him at the property for the first time he used divining rods to locate where to drill.  I had never seen a good ol' fashioned water witching before... obviously I can't say it didn't work!

And here is the trench with everything buried and tucked in nice an tight!

The lot looks barren with all of the dead trees removed.  The drought has been brutal.  The broken earth in the foreground is where the septic field will be located.

This is just the start of a massive hole that will host the 2 septic tanks.  About 4 feet down the rock got seriously tough.  We had to bring a giant jack hammer.  This hole needs to be 8 feet deep to host the tanks...

Here is the pile of dirt and rock excavated from the septic site.  Let me know if you want it....

A view looking away from the garage with the septic field underway on the right, and the water tank off in the distance.

We didn't recycle all of the trees.  I'll put these to good use when the outdoor fireplace is ready!


Here are a few shots of the water tanks and lines installed at the well.  This is only temporary as we'll get these enclosed in a shed this summer.  Unfortunately, it was a brutal winter down here and we had to be mindful of the pump and plumbing during several hard freezes.  We suffered some freeze damage to a couple of lines, but Apex fixed them up straight away and we got serious about make plans for an enclosure.  Right now we are really liking the Kanga Room systems for a small storage shed to house the pressure tank, plumbing and provide a nice space to keep misc tools and items.


More on the septic system in future posts. Thanks for checking in!